Wednesday 20 September 2017

Tutorial 7 - Easy to make flower pincushion

Let's make this sweet little flower pincushion. You can also use it as a wristlet pincushion! :)


1) First, make a circle template (the size you desire). For my pincushion above, I used a metal cup with diameter of 9.5cm to make my template.

2) With the template, cut out 5 pieces for petals and 1 piece for the flower centre. Use small running stitches to gather the fabrics, as shown.


3) Stuff each petal 2/3 way with toy stuffing or polyfibre.

4) Use strong thread or crochet yarn and sew the 5 petals together


5) Stuff the flower centre fully.


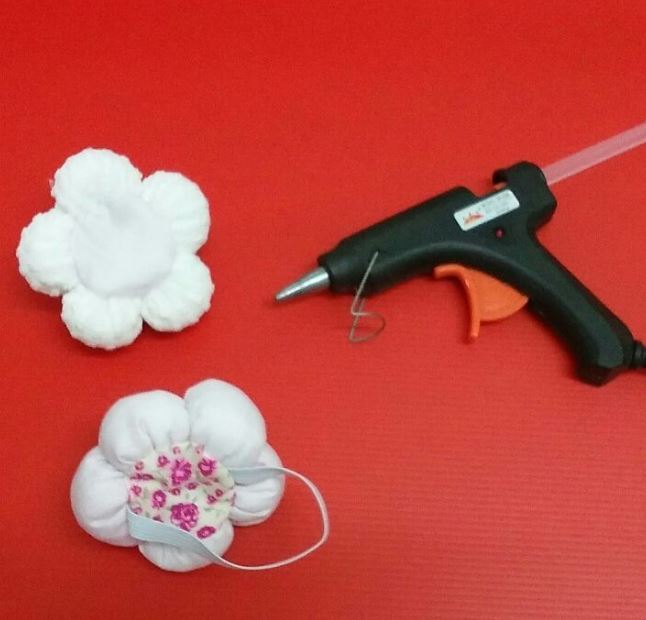
6) Hot glue the flower centre to the petal base. Glue a circle of felt to the back of the pincushion.


7) To make the wrist pincushion, simply hot glue an elastic band (make sure it fits around your wrist) to the back of the pincushion before gluing on the felt circle.

8) Decorate or embellish as you desire! :)

Hope you enjoy making this pincushion project! Happy Crafting Everyone! :D


Wednesday 13 September 2017

Square Pillow Pincushions - Variations

I love making pincushions and pillow pincushions are one of the easiest to make. Here are a few variations that I have done.

This is really easy to do and is elegant too. Just sew/glue a single bloom and leaf to the pincushion. 


There are 2 tiny pillow pincushions on this doll chair and both are so easy to make.


These 2 were made from burlap but I filled them with small pebbles instead of toy stuffing because I wanted to use them as paperweights. :)


The fabric was printed with cute perfume bottles so instead of squares, I cut these into rectangles and made these little pincushions with pockets on the back to put tags or scissors. I think these will be nice as gifts. :)


This Cathedral Window pincushion was made from a 4-patch block.


I love the lace edging on these! :)


These were a little time consuming but so fun to make - crazy quilt pillow pincushions! :)


2-layer (crazy quilt) pillow pincushions - was inspired to make these after watching the Prince of Persia! :)


Lastly, a 2-layer lace wedding ring pillow - made for a friend whose son was getting married earlier this year.


Hope these pics will  inspire you to make your own pillow pincushions! :)

Happy Crafting Everyone! :D

Tutorial 6 - Easy to make Square Pillow Pincushion


 Today. we will be making a square pillow type pincushion. This is probably one of the easiest pincushions to make! There are so many different ways to decorate and embellish and it's also a very fun project to do,:)


1) First, cut out 2 pieces of fabric square (any size you like!). For this project, mine is 6x6 inches.


2) Working on the wrong side of the fabric, sew around the 4 edges, leaving a small opening for turning (to the right side).

3) Fill the little pillow with toy stuffing or polyfibre. Then using small stitches, sew up the opening.


4) Find the centre of the pillow and using strong thread, make 2 stitches through and pull tight to make a dent. Sew a few more stitches to secure and end off.


5) Glue buttons into both dents or decorate as you desire.  As you can see from the first pic, I made mine into a Warrior Bear Princess pillow throne....love how it turned out! :D

I will be showing you variations of this simple project in the next post. In the meantime, I hope you will have fun making your own pillow pincushions! :)

Happy Crafting Everyone! :D